 Move Welcome
Open Welcome
Welcome to Telebugs
Thank you for choosing Telebugs!
Telebugs is a refreshingly simple error tracking tool designed to help you catch and fix production errors in real-time. Whether you're building web apps, mobile apps, embedded systems, or games, Telebugs ensures you stay on top of issues before they impact your users.
It’s fully compatible with Sentry SDKs, meaning it works seamlessly with a wide range of languages and frameworks right out of the box.
Unlike cloud-based error tracking services, Telebugs is self-hosted — so you own your data, with no restrictions on the number of errors, projects, or team members. Track as much as you want, invite as many collaborators as you need, and maintain complete control over your infrastructure.
This manual will walk you through setting up Telebugs and making the most of its features.
Let’s get started on making your software more reliable than ever!
Welcome
148 words
Move Installation
Open Installation
Installation
Since Telebugs is self-hosted, you'll need to have a few things ready before getting started:
- Your own domain name (e.g., example.com or telebugs.example.com).
- A machine connected to the internet.
- Basic tech skills (familiarity with SSH and terminal commands).
Installation steps
The whole process takes less than 10 minutes. Here’s how to get started:
- Choose a server: Select a machine to host Telebugs (cloud or local). I recommend DigitalOcean (setup guide) or Hetzner (setup guide).
- Point your domain: Update your DNS to link your domain to your server’s IP address. Ensure it’s a direct DNS record (no proxying — Telebugs handles SSL).  You need at least 2GB RAM and 1 CPU. IMPORTANT: Don't use ARM64 — Tailwind doesn't work on it yet, and Telebugs relies on Tailwind. Learn more.
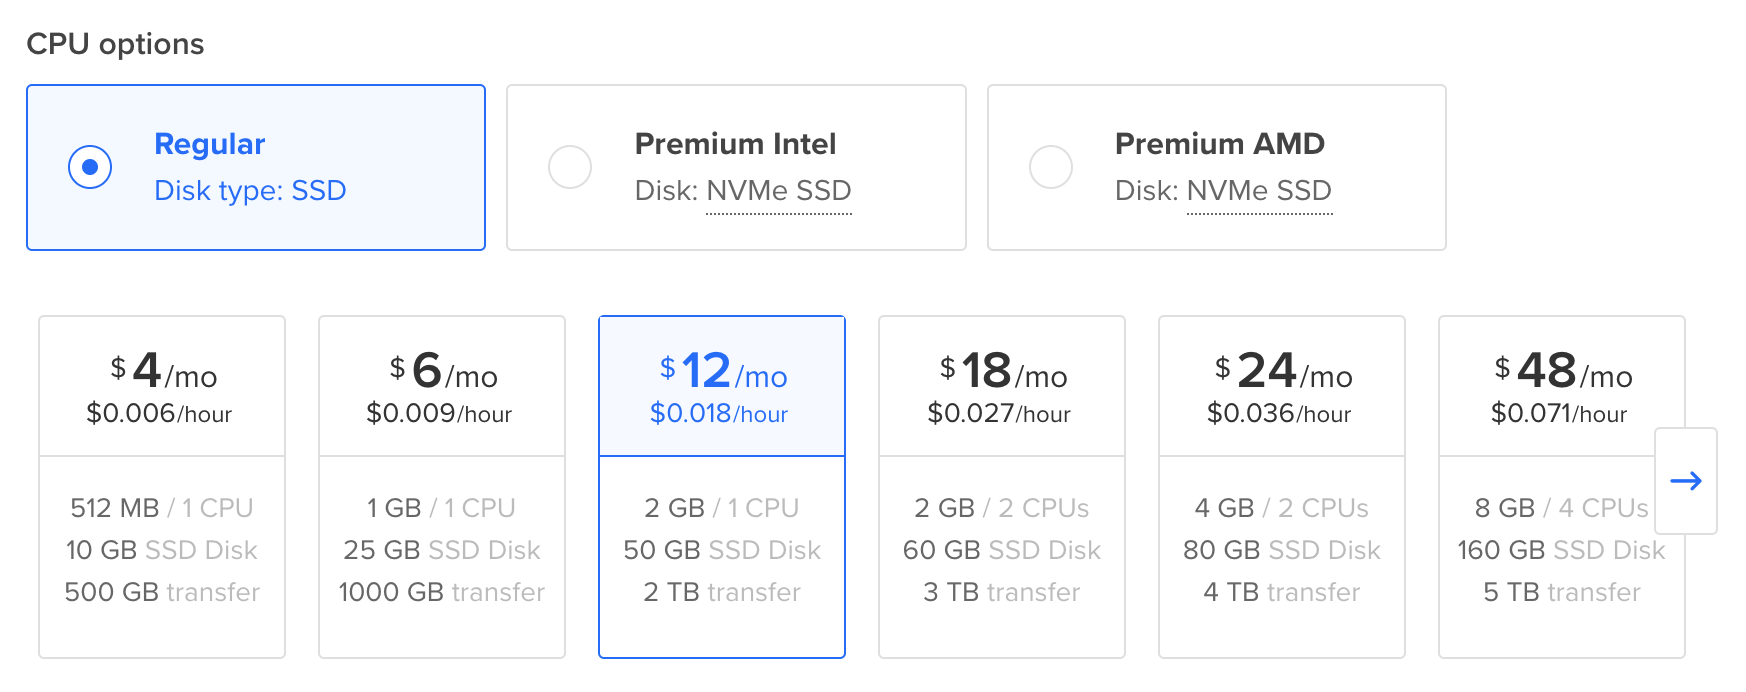
Set a password to connect to your server. 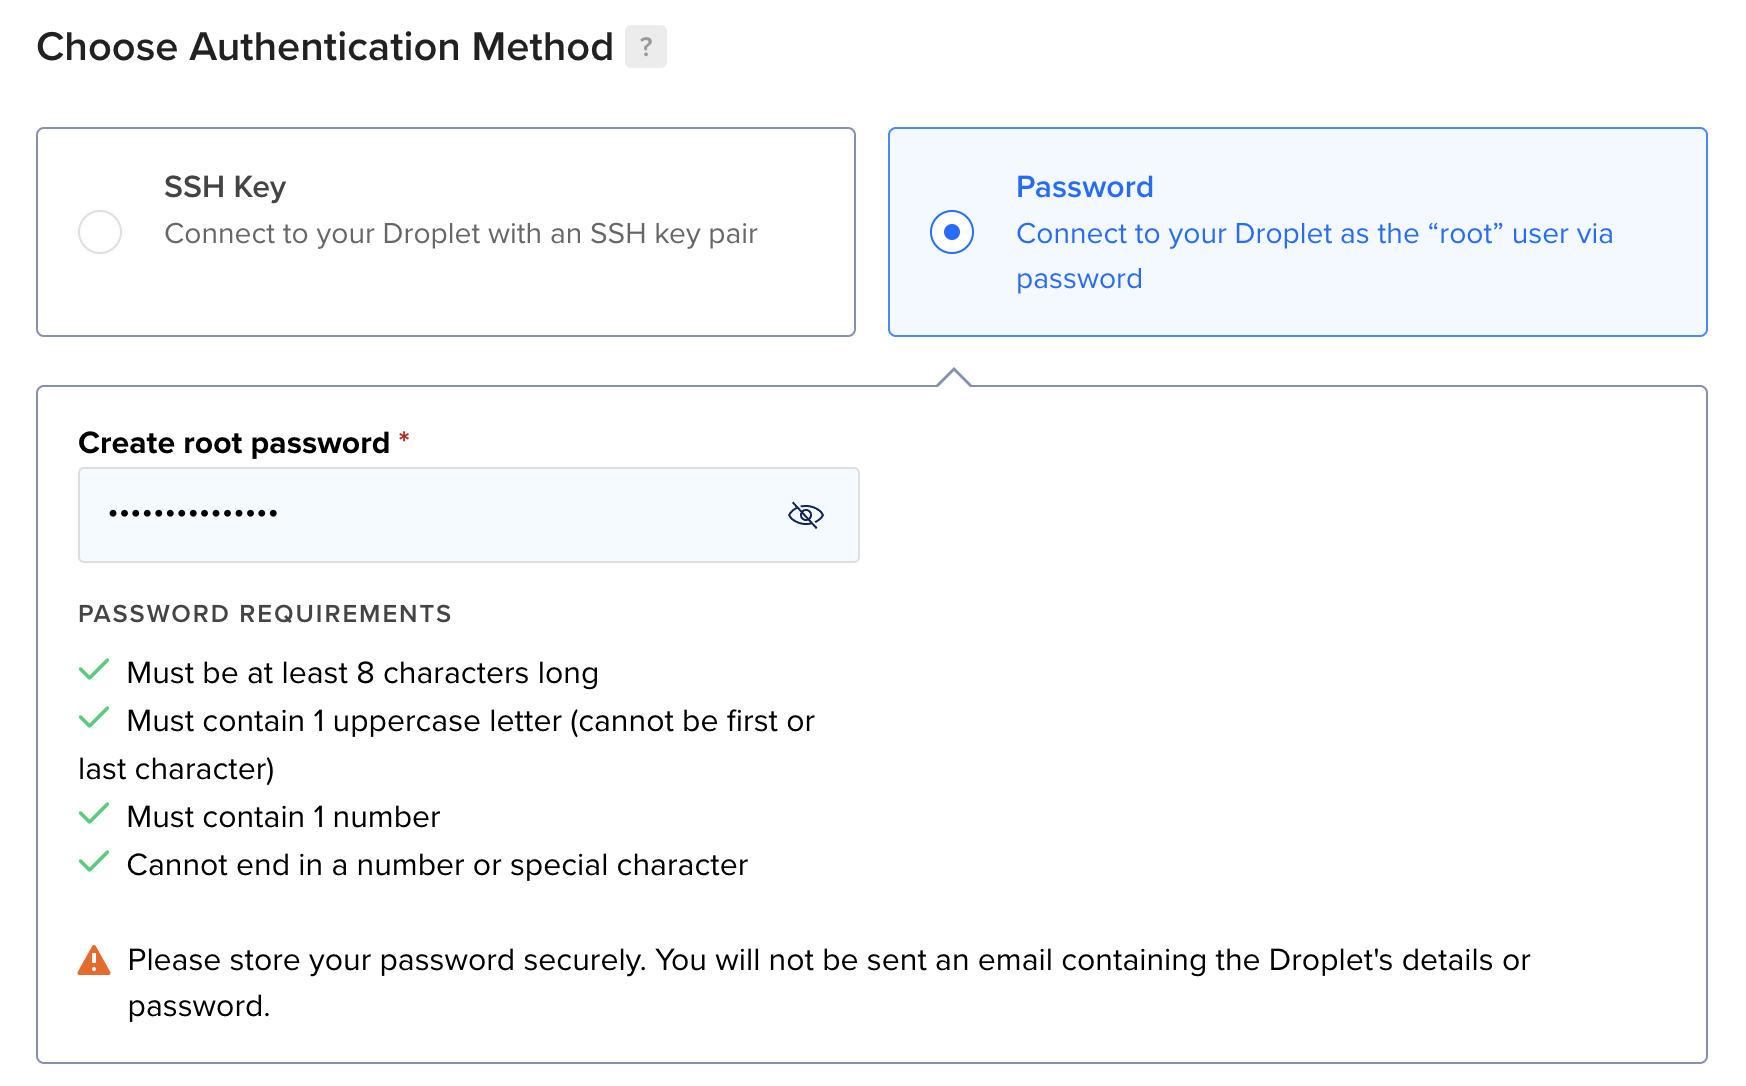
Leave the
Installing on Digital Ocean
292 words
Move Installing on Hetzner
Open Installing on Hetzner
Installing on Hetzner
Hosting Writebook on Hetzner is a smart pick. It’s budget-friendly and simple to set up if you’re comfortable with some basic tech steps.
After signing up for a Hetzner account, follow these quick steps. It should take about 5 minutes.
In your Hetzner project, click + Create Server and pick a plan. 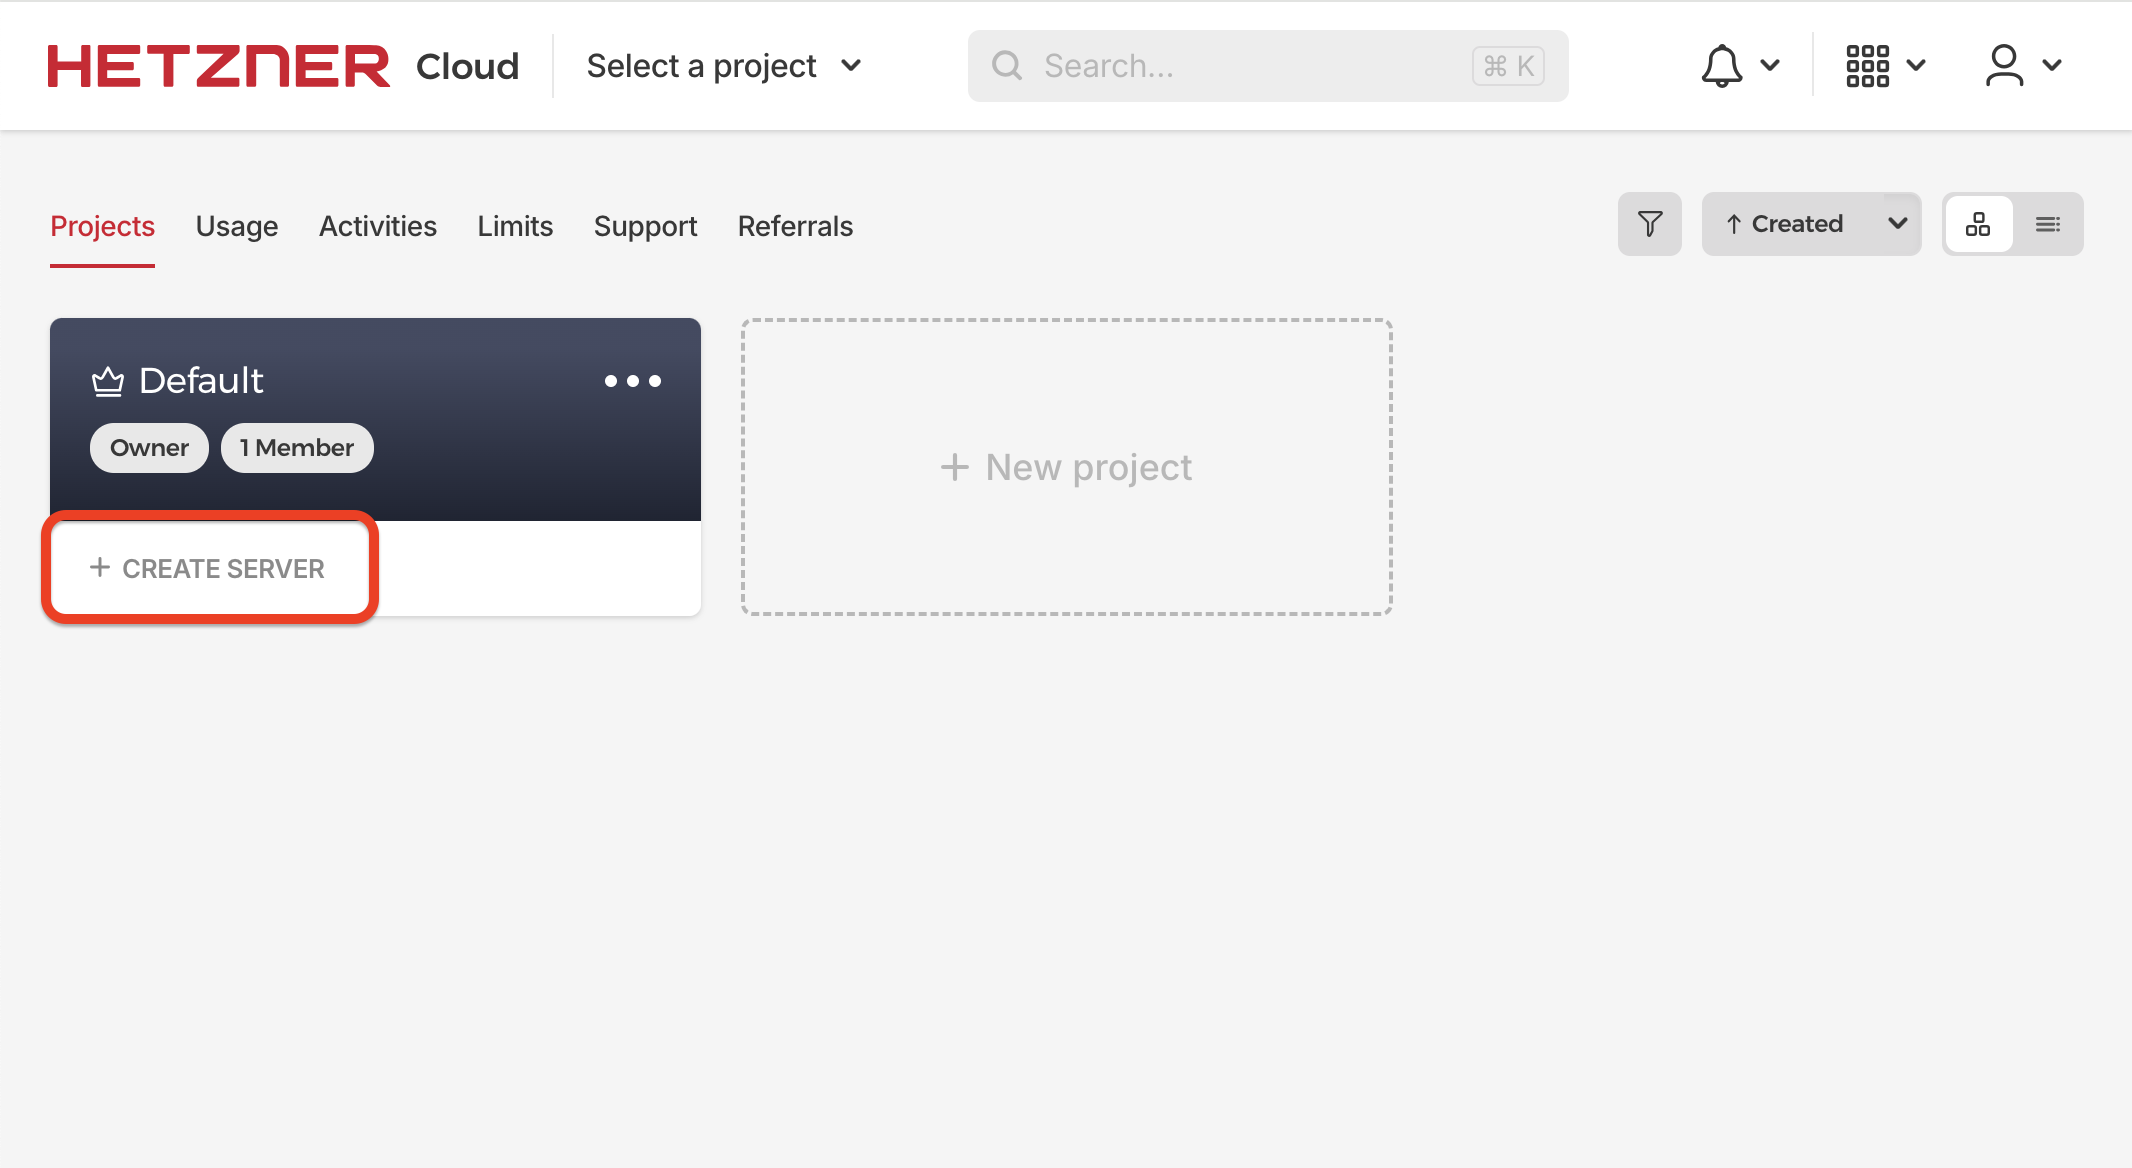 You need at least 2GB RAM and 1 CPU. IMPORTANT: Don't use ARM64 — Tailwind doesn't work on it yet, and Telebugs relies on Tailwind. Learn more
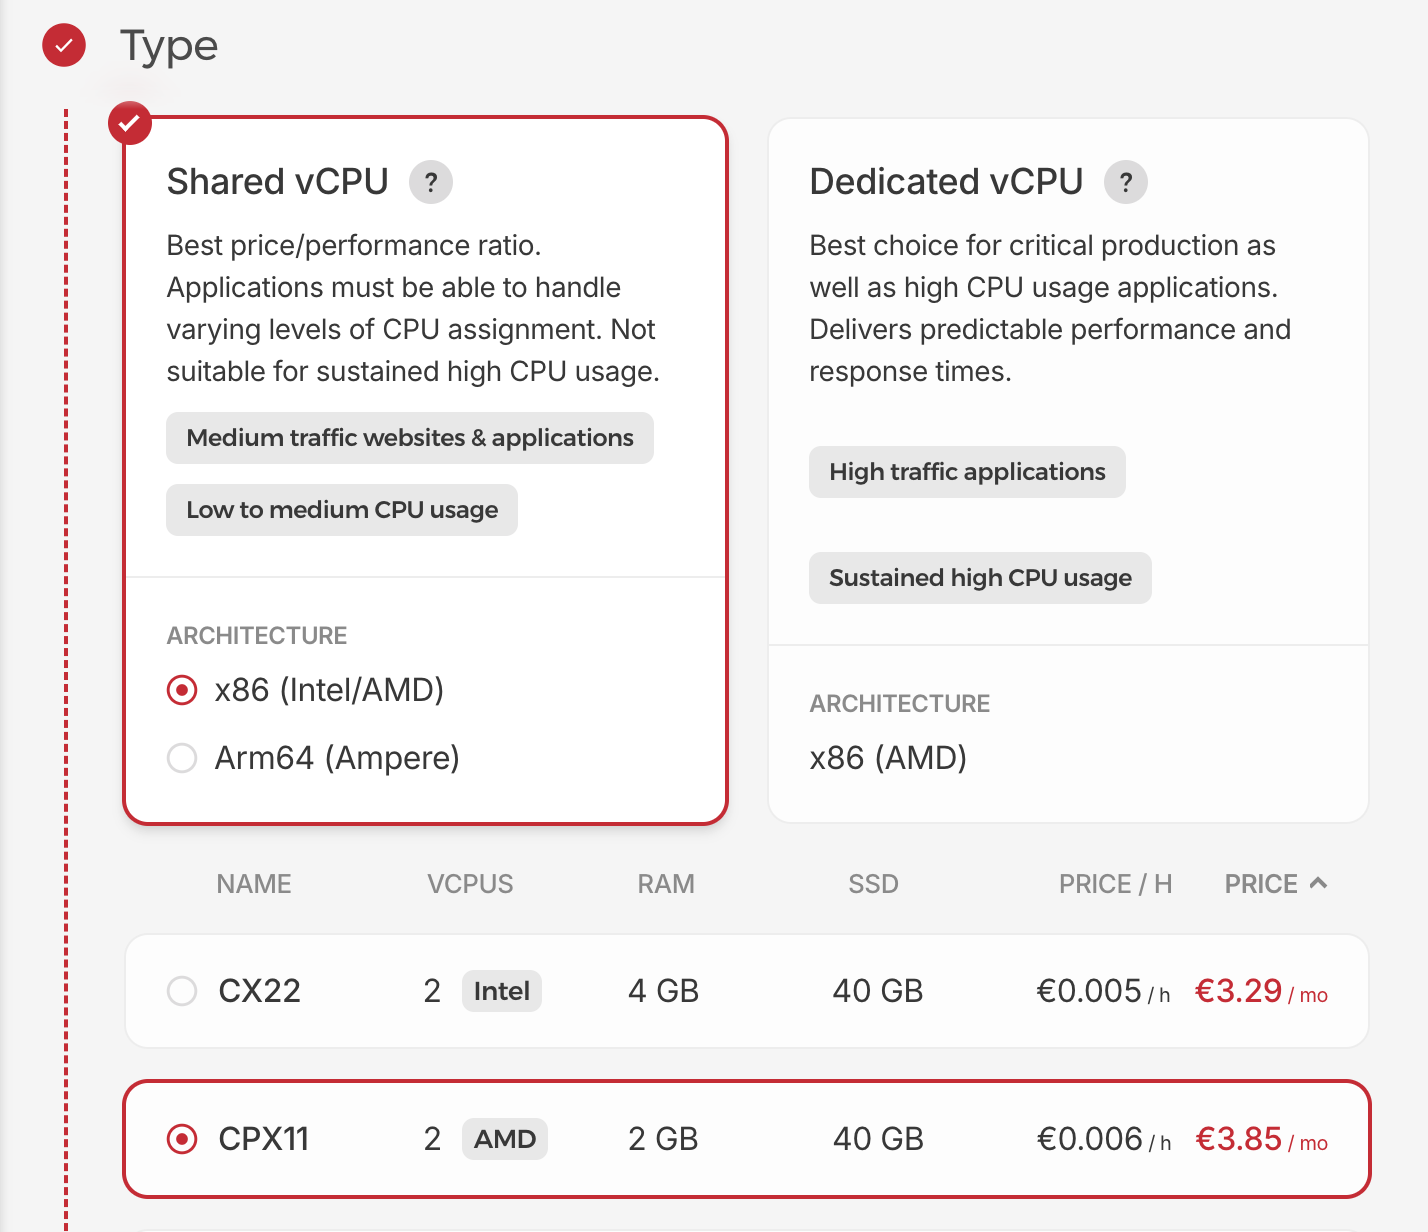
Keep the default settings and click Create and Buy now. Your server will be ready in a few minutes.
Once it’s ready, copy the Public IP address. This link
Installing on Hetzner
263 words