Creating Your Project
Telebugs uses Projects to organize and isolate errors from your applications. Each project typically corresponds to a specific language, framework, or subsystem. Each project is assigned a unique token at creation, which your app uses to send errors.
Below is a recommended workflow and an overview of the project creation form.
How to organize projects
- By language or framework: Group errors by language or framework for clearer context (e.g., Ruby, JavaScript, PHP, Laravel, etc.). This is the standard way.
- By subsystem: Track web requests, background jobs, or microservices separately if desired.
- By environment: Separate projects can track errors in different environments (e.g.
stagingandproduction) - Custom organization: You can consolidate all errors into one project — or carve them up however you prefer. Telebugs gives you complete freedom.
Example
Web app (Ruby on Rails)
- Project name:
Blogorblog.example.com - Purpose: Capture server-side Ruby errors from your Rails app at
blog.example.com.
Front‑end (JavaScript)
- Project name:
Blog (JavaScript)orblog.js - Purpose: Capture browser‑side JavaScript errors for the same application.
The “New Project” form
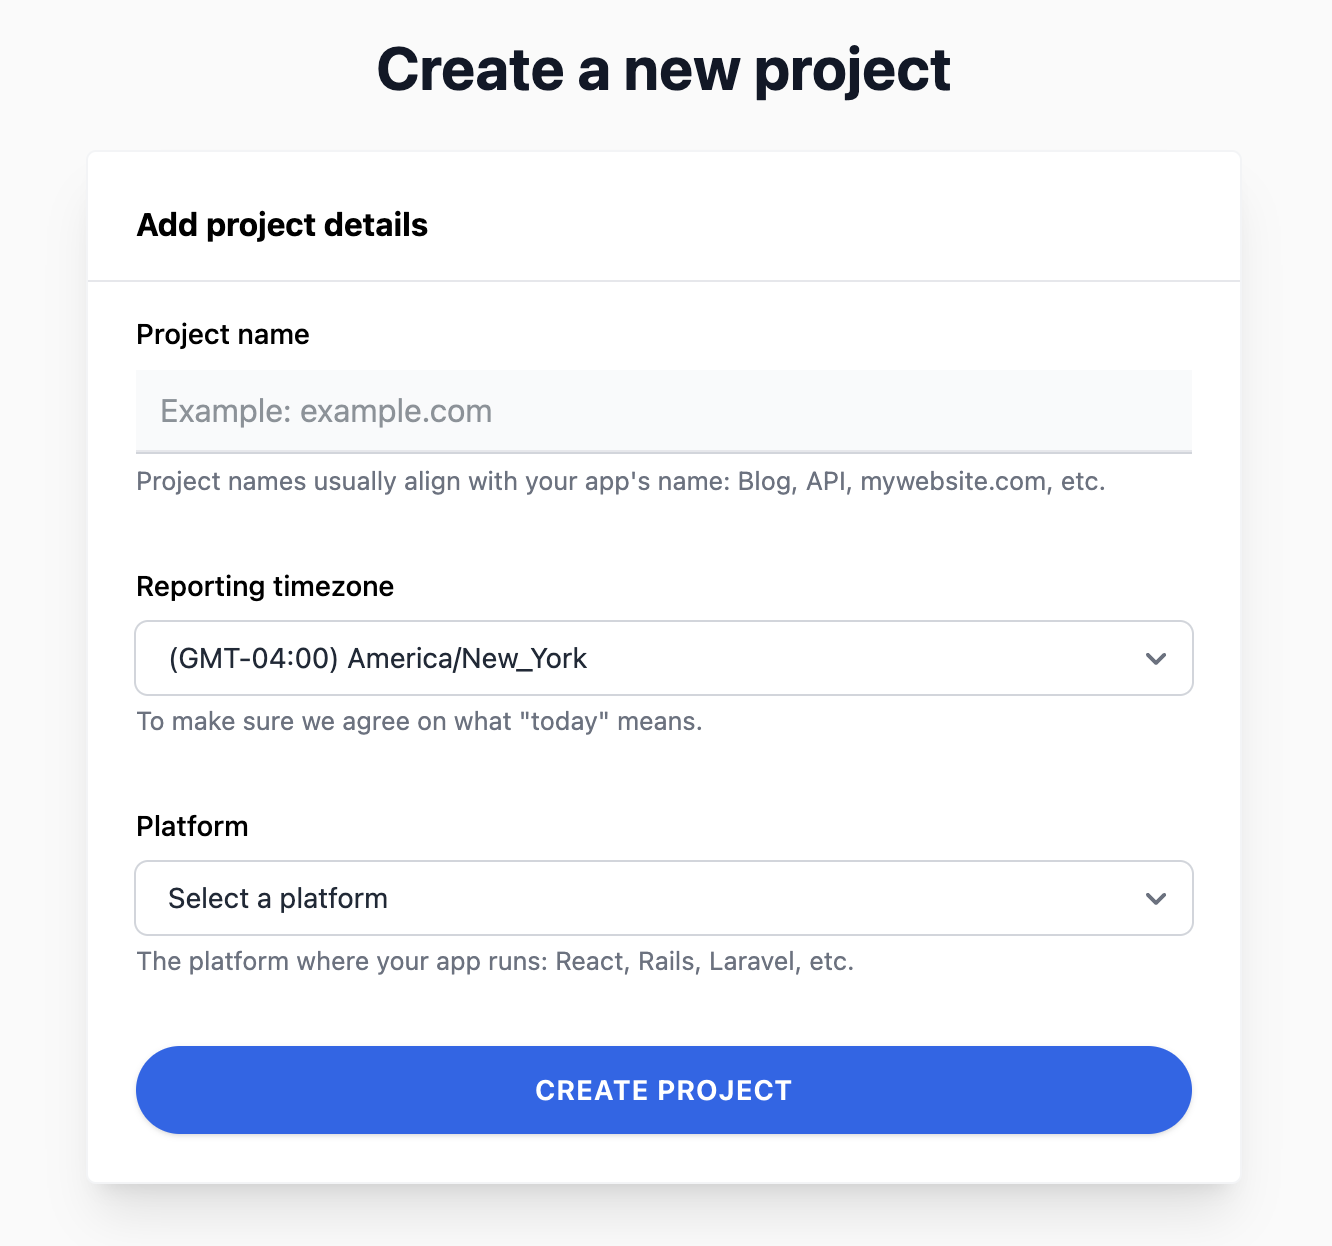
When creating a new project in Telebugs, you’ll encounter these fields:
| Name | Description |
|---|---|
| Project name | Any string you choose. You can use any characters you like. |
| Reporting timezone | Defaults to your local timezone. Use this to align “today,” error timestamps, and graphs with your server or team’s region. You can switch to any timezone (including UTC) at any time. |
| Platform | Select the primary language or framework for this project (e.g., Ruby, JavaScript, PHP, Laravel, etc.). Currently, this only affects the project icon; future versions may apply platform‑specific behavior. |
With your projects in place, you’re ready to configure your applications to report exceptions. Proceed to the next chapter to integrate Telebugs into your codebase.